User Workflows
This section describes the workflows a user should follow when using the TeleSculptor software. There are several ways to use the software depending on whether the end goal is to produce camera models for import into SketchUp, to create a fully automated 3D models from FMV, or simply to inspect the accuracy of the KLV metadata provided with an FMV clip. The available workflows are described below. The details of each processing step are described in the following Processing Steps section.
Metadata Inspection
This is the simplest capability provided by the TeleSculptor application. When loading a video, the application will read all the KLV metadata (assuming MISB 0601 or 0104 standards) and convert metadata pertaining to the camera location and orientation into 3D visualization of these cameras. This is useful for checking if a video has camera pose metadata and validating that the cameras are pointing at the correct location. This visual check can help find gross errors in metadata that are difficult to interpret by just looking at the raw metadata values.
A metadata panel on the side of the user interface shows all KLV fields associated with the current frame. Values in this panel will update as the video is played or scrubbed. If no metadata is available for a given frame the values are all set to “(not available)”. In the example shown below we see a video with MISB 0104 metadata. The platform path is well represented, but this video has only platform orientation and is missing sensor orientation, so the metadata cameras are all rendered pointing up.
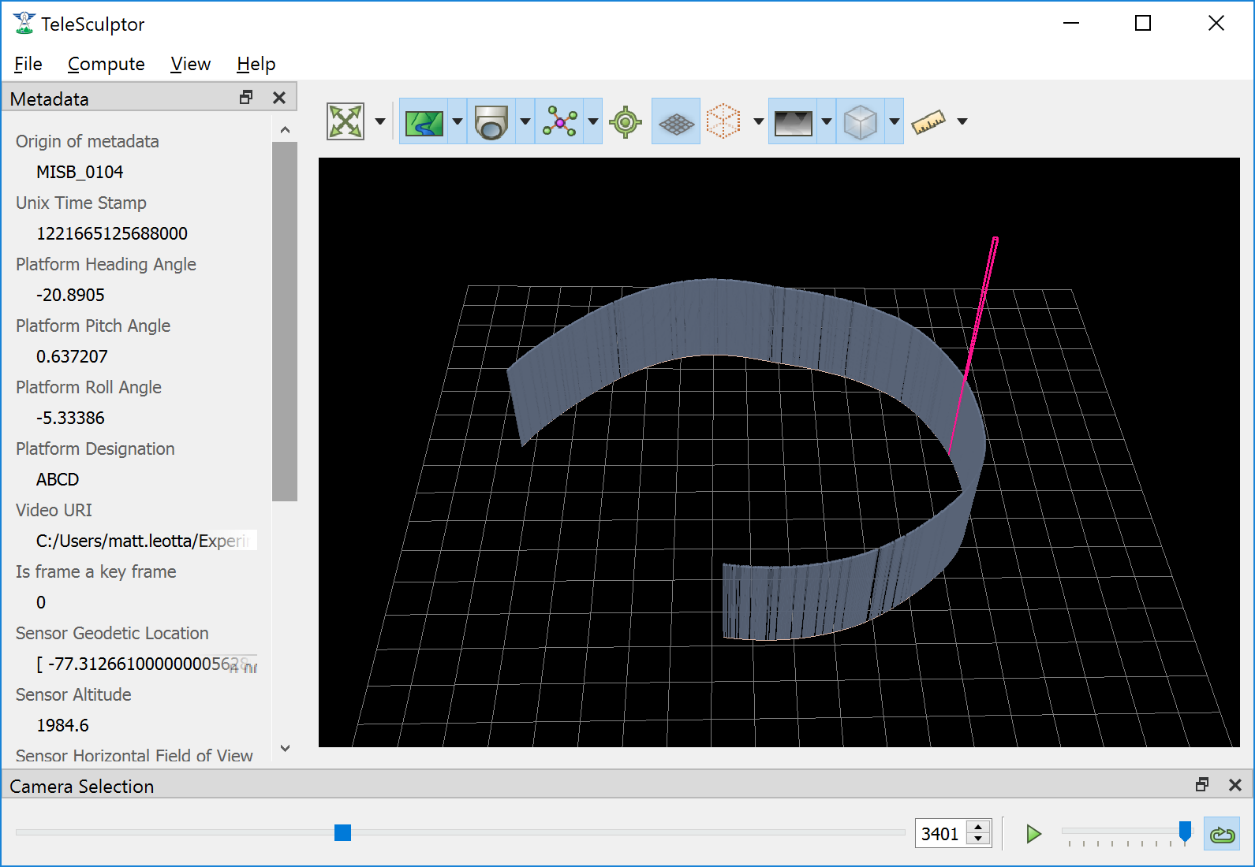
Inspecting Metadata geometrically and with the metadata viewer pane.
To inspect the metadata, follow the instructions for opening a video. There is no need to create a project file if no further processing is anticipated. When a video is opened it is automatically scanned for all metadata to build the 3D representation of the cameras. Scanning a video for metadata may take several seconds or even minutes for very large videos. While TeleSculptor is scanning the video one can still playback the video or seek with the frame selection slider to preview the imagery and metadata values.
SketchUp Enhancement
The goal of this workflow is to estimate accurate camera models for keyframes in the FMV and then import those keyframes and camera models into SketchUp to use the Match Photo interface to build 3D models in SketchUp by drawing directly on the images. The SketchUp workflow is described in a separate document. This document describes how to use TeleSculptor to produce the data that will be loaded into SketchUp. The processing steps are as follows
- Create a New Project
- Import a Video
- Track Features
- Estimate Cameras/Landmarks
- Save Frames
- Set Ground Control Points
Dense Automated 3D Models
The goal of this workflow is to automatically estimate a dense 3D model of the scene without using SketchUp. The processing pipeline builds on the estimated cameras used in the SketchUp workflow. It estimates dense depth maps from multiple different viewing directions and then fuses the depth maps together into a unified 3D surface mesh. The processing step are as follows
- Create a New Project
- Import a Video
- Track Features
- Estimate Cameras/Landmarks
- Batch Compute Depth Maps
- Fuse Depth Maps
- Colorize Surface
- Export Fused Mesh
If running both the SketchUp Enhancement and Dense Automated 3D Models workflows on the same video, there is no need to repeat the common steps (1-4). Simply run steps 5-8 on the existing camera and landmark estimation. Optionally, selecting a smaller 3D region of interest (ROI) before step 6 or 7 will limit the region of computation and compute results more quickly. By selecting “Run End-to-End” in the compute menu, TeleSculptor will automatically run steps 3-6 one after the other.